All posts by Don Matteo

lives in Switzerland, is System Engineer MCP at A-Enterprise GmbH. Member of the UNBLOG Knowledge Network. Author and blogger topics, tutorials for Linux and Open Source.

Nemo Action Context Menu Extract Here

Add Compress and Extract here Action to Nemo File Manager as Context Menu

Nemo is the amazing file manager of Cinnamon’s desktop environment. It’s a further development of Gnome’s Nautilus file manager with easy customization options. Adding a context menu to unpack and compress folders and files is a simple task.

Add action compress and extract to Nemo

Adding the context menu action for compress and extract in Nemo will show in this tutorial. We open a terminal and copy & paste the following content into the path see below and save it as file compress.nemo_action

$ xed ~/.local/share/nemo/actions/compress.nemo_action
[Nemo Action]
Active=true
Name=Compress...
Comment=compress %N
Exec=file-roller -d %F
Icon-Name=gnome-mime-application-x-compress
Selection=Any
Extensions=any;

As well as the entry for extract archives action into file extracthere.nemo_action

$ xed ~/.local/share/nemo/actions/extracthere.nemo_action
[Nemo Action]
Active=true
Name=Extract here
Comment=Extract here
Exec=file-roller -h %F
Icon-Name=gnome-mime-application-x-compress
Selection=Any
Extensions=zip;7z;ar;cbz;cpio;exe;iso;jar;tar;tar;7z;tar.Z;tar.bz2;tar.gz;tar.lz;tar.lzma;tar.xz;

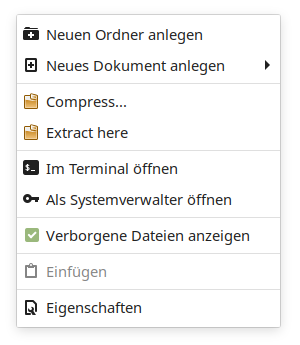
Nemo shows compress and extract here

Then a right click on an archive file shows the context menu with compress and extract here.

Nemo Action Context Menu Extract Here
Nemo context action menu (right-click)

Action context compress extract for any user

This enable the action context menu compress and extract to Nemo for the current user only, if you prefer the ability for any user, then move the file compress.nemo_action and extracthere.nemo_action into /usr/share/nemo/actions, you need root privileges to can do it.

$ sudo mv ~/.local/share/nemo/actions/*.nemo_action /usr/share/nemo/actions
Nemo File Manager Action Context Menu Extract Here
Nemo File Manager

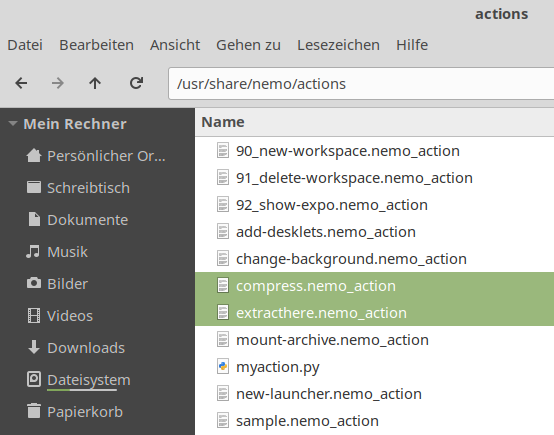
 The common compression tools are preinstalled on most distos. 7-Zip is another all in one compression tool and very popular by Sysops, this can be installed with the following command.

$ sudo yum install -y p7zip p7zip-plugins
7-Zip

Disable Linux Mint automatic login

Linux Mint during installation offers the option of enabling system start with automatic login. If the password entry is to be restored later, as with Ubuntu 10.04, the option can no longer be found in the settings. This post show how to re-enabling the user login with password entry under Linux Mint 20 Ulyana.

It was necessary to switch off the automatic login after it was found that the email client Geary did not save the passwords of the accounts, these had to be re-entered after each restart.

Linux email client Geary

Since Linux Mint 19 Tessa Cinnamon there has the option Automatic login in the Control Panel – Login window. The setting can now be made with an text editor, open a terminal by hit CTRL + ALT + T and enter the following command:

~$ sudo vi /etc/lightdm/lightdm.conf

and remove this lines:

autologin-user=user1
autologin-user-timeout=0

 if you are not familiar with vim, your may use nano or xed.

After restarting and logging in with a password, the key management opens in the background, which enables Geary to save the passwords in the seahorse key management.

Linux Mint 20 Cinnamon modify lightdm.conf to change autologin
Linux Mint 20 Cinnamon – disable autologin
modify lightdm.conf to change autologin
Linux Mint Terminal: cat /etc/lightdm/lightdm.conf

Another possibility to switch off the automatic user login is to remove the user in the Username field in the User section – System Settings – Login Window.

Linux Mint control panel logon setting
Anmeldefenster – Benutzer – Benutzername muss leer sein.

Without automatic login, the Username field must be empty.